Configuring the Active Directory Recycle Bin
AD Recycle Bin allow you to restore accidentally deleted AD objects without the need of restoring complete AD Database, but first of all, you need to Enable this feature. So that is what we are going to describe.
Step 1: Enable the Active Directory Recycle Bin

Step 2: Create and delete test users
AD Recycle Bin allow you to restore accidentally deleted AD objects without the need of restoring complete AD Database, but first of all, you need to Enable this feature. So that is what we are going to describe.
Step 1: Enable the Active Directory Recycle Bin
- Login to your Server, Open Server Manager, click Tools, and then click Active Directory Administrative Center (ADAC).
- Click (Mumbai local) (My Domain Name).
- In the Tasks pane (Right Corner), click Enable Recycle Bin, click OK, and then click OK.
- Press F5 to refresh ADAC.
Step 2: Create and delete test users
- Either from Active Directory Administrative Center, or from Active Directory Users and Computers
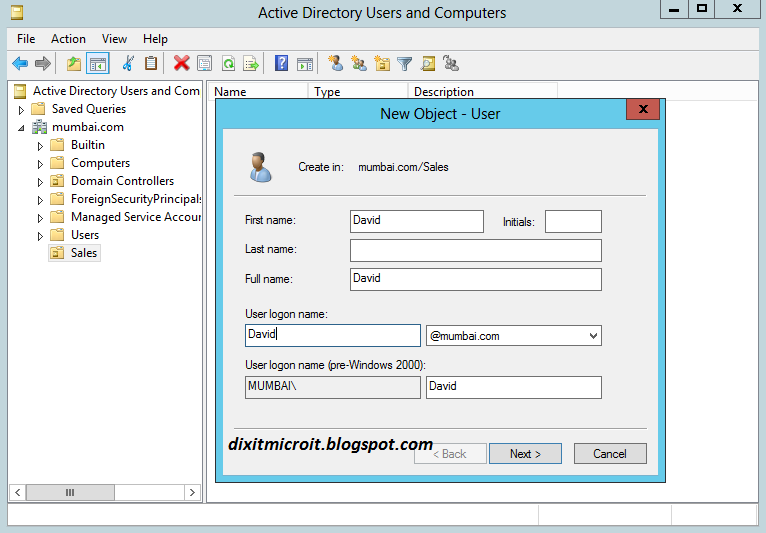
- Select Sales OU and create new User with the following information, and then click OK.
- Full name: David
- User UPN logon: David
- Password: Pass@123
- Confirm password: Pass@123
- Repeat the previous steps to create a second user, Dixit.
- Select Dixit. Right-click the selection, and then click Delete.
- Click Yes at the confirmation prompt.
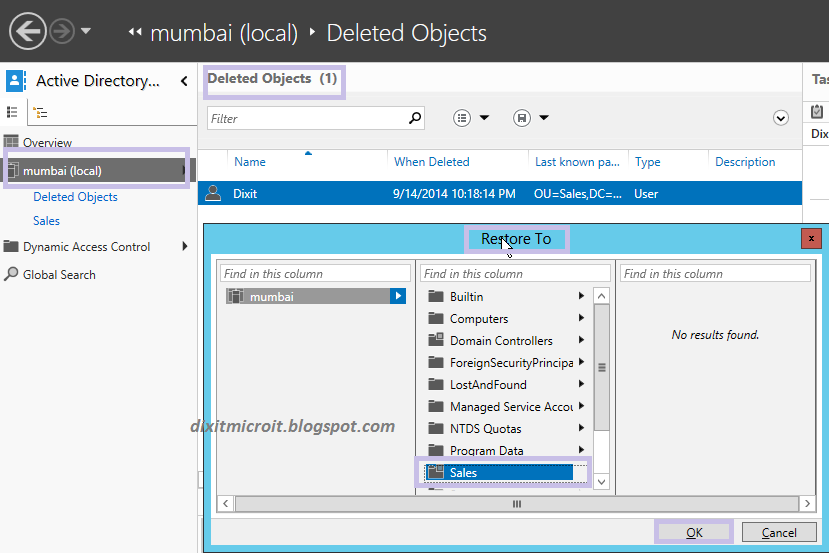
- In Active Directory Administrative Center, click Mumbai (Local), and then double-click Deleted Objects.
- Right-click Dixit, and then click Restore To.
3.In the Restore To window, click the Sales OU, and then click OK.
4.Confirm that Dixit is now located in the Sales OU.
I hope you have enjoyed this new feature. Write comment if you have any query regarding this topic.
I hope you have enjoyed this new feature. Write comment if you have any query regarding this topic.
No comments:
Post a Comment